
Adding an image in WordPress isn’t that hard, but it’s got a few more steps than you’d expect if you’re used to something like Microsoft Word, where you just copy and paste it in. That’s because WordPress offers lots of options that you don’t normally have to think about when using Word, but you don’t have to use them in WordPress either.
What you’ll see here is the simplest way to add images, with the most basic options.
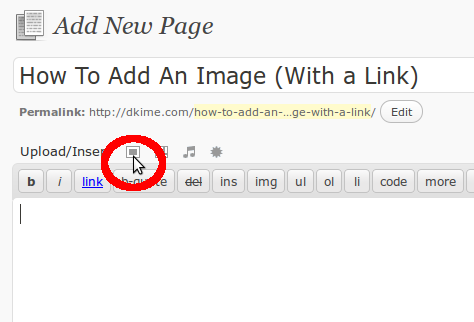
1. When adding a post (or page, which I’m showing in these pictures) there are four buttons directly above the editor. They are used for uploading or inserting pictures, video, audio, or “media”, which means things like Flash games. We’re going to look at the first button: Image.
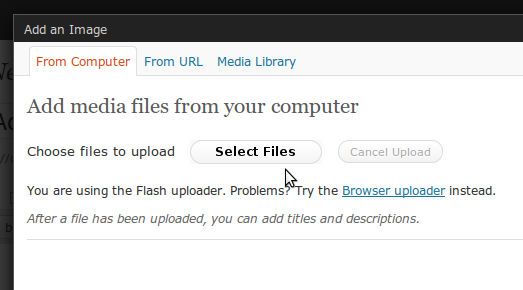
Click on that and you’ll get a popup window asking you what image you want to use.
2. Select the file you want. Usually this will be one from your computer that you want to upload. Click “Select Files” and choose the image from your computer.
Quick note here: If you want to insert an image you’ve already used somewhere else, you can select “Media Library” and choose from anything you’ve uploaded in the past.
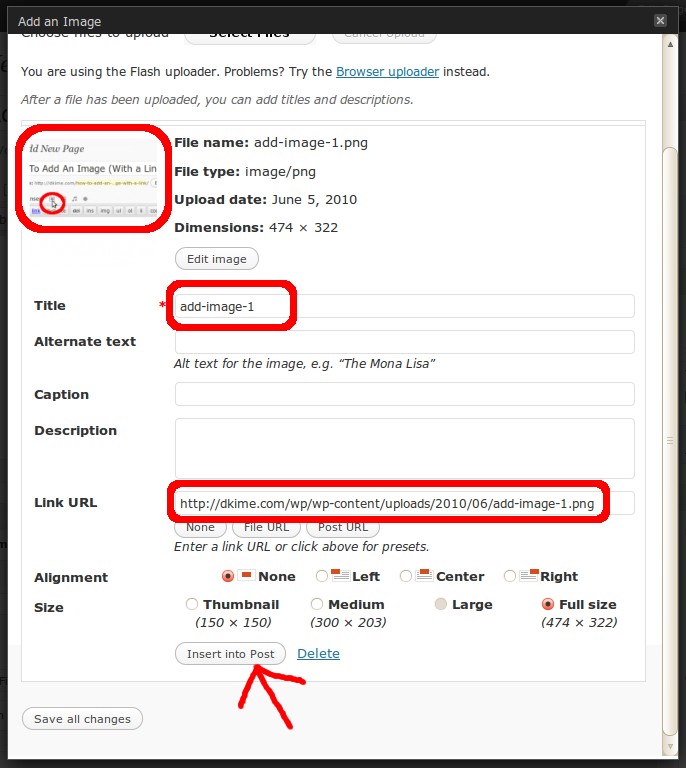
3. Once you’ve selected the image and it finishes uploading, you’ll get an options screen where you can change lots of stuff. I’ve highlighted the four things you need to worry about.
The first rectangle shows a thumbnail view of whatever you just uploaded.
The second shows the Title. This is what appears in the popup box when you point to the image in the published post.
Third is the “Link URL”. This is where people will go if they click on the image.
- If you don’t want the image to link anywhere, delete the text or click the “None” button.
- If you want it to go somewhere else, enter the address of the page you want people to go when they click.
Fourth and most important: After you’ve filled in everything else, DO NOT click the “Save all changes” button. You want to click the “Insert into Post” button.
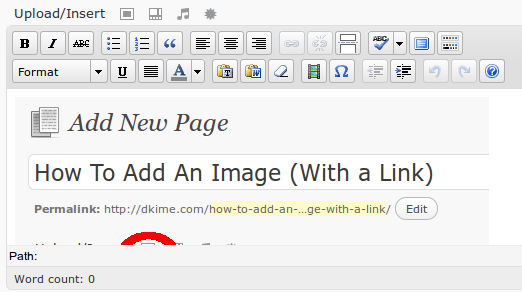
4. Your image is now inserted into your post.
And that’s it.
of course…simple as grandma’s pie! Thanks!